|
|
|
|
EU Settings > Special Considerations |
|
|
|
|
|
EU Settings > Special Considerations |
|
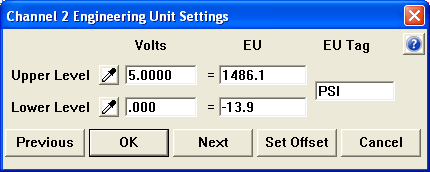
Use the Set Offsetbutton to set an offset to your waveform. For example, after you have entered and saved the settings you notice that at an input of zero (for example, a pressure sensor with no pressure applied where 0V equals 0 PSI) your reading is something other than zero. You can force engineering units to zero by opening the Engineering Unit Settings dialog box, making sure the applied input is zero, and clicking on the Set Offset button. This action vertically shifts the entire calibration line in the direction required to force the reading to zero engineering units, while preserving its slope. In so doing, the EU values will change by the offset amount. This is normal and necessary, and for this reason the Set Offset feature should not be applied unless it is certain that the detected offset is a constant value and present across the entire measurement range of the acquired signal.
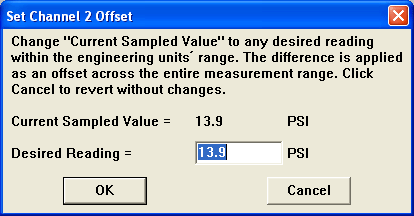
When Set Offset is clicked a dialog box will pop up allowing you to set the Offset. For example, when using a pressure sensor, you notice that when there is no pressure applied your reading is 13.9 PSI and you should apply an offset to your data.
Go to the Engineering Unit Settings dialog box and click on the Set Offset button.

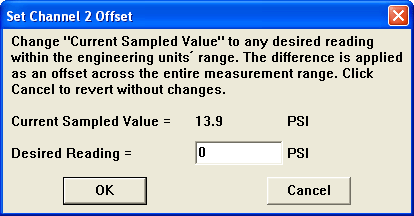
The Current Sampled Value is 13.9 PSI. To change this to 0 PSI edit the Desired Reading text box (enter 0 to force to zero).

Click OK to set your offset. Your upper and Lower EU values change to match your offset.

Click CANCEL from the Set Offset dialog box to exit and revert to the Engineering Unit Settings dialog box without making any changes. Note that applying an offset to a waveform will cause it to shift vertically by the amount of the offset. Adjust screen scaling as required by selecting LIMITS.. from the SCALING pull-down menu (see Scaling Limits).
Please Note: Using the Set Offset dialog you can set the offset from any known value - not just zero.
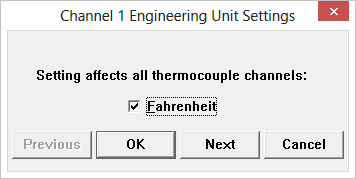
For DI-245 Users with a Thermocouple Channel you will see the following dialog box:

Change from Fahrenheit to Celcius with the provided checkbox. Checked = Fahrenheit; Unchecked = Celcius. This sets the Temperature scale for ALL Thermocouple channels.