
 View Cart
 sales@dataq.com
 330-668-1444
Often, when acquiring data for later analysis, an event occurs that directly impacts the information being collected.
In this post, we’ll show you how to insert “event markers” in a file. Event markers allowing you to mark the instant (date/time) at which a particular event occurred.
Enabling the Digital Channel
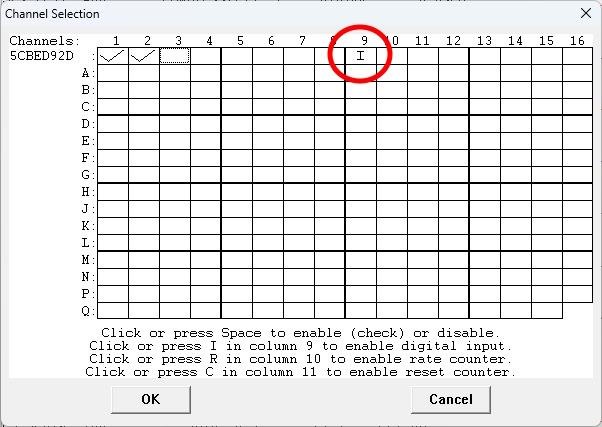
To insert event marks, you’ll first need to enable the digital channel in WinDaq.
To do so, choose ‘Enable Channels’ from the ‘Edit’ pull-down menu and click the channel 9 checkbox (as shown below).
With the digital channel enabled, choose ‘Remote Event +’ or ‘Remote Event -‘ from the ‘Options’ pull-down menu.
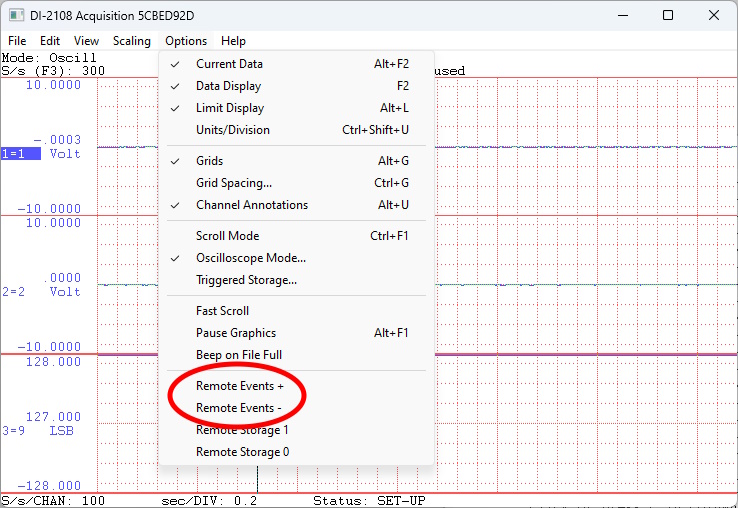
Note that the digital ports (D0-D6 on most contemporary DATAQ data loggers) are all pulled high by default; so choosing ‘Remote Storage -‘ allows you to insert an event mark by simply shorting the “Event” terminal (D0).
With ‘Remote Events -‘ selected, and WinDaq recording, an event marker will be inserted in the file each time the ‘Event’ terminal (D0) is pulled low (shorted + to -).

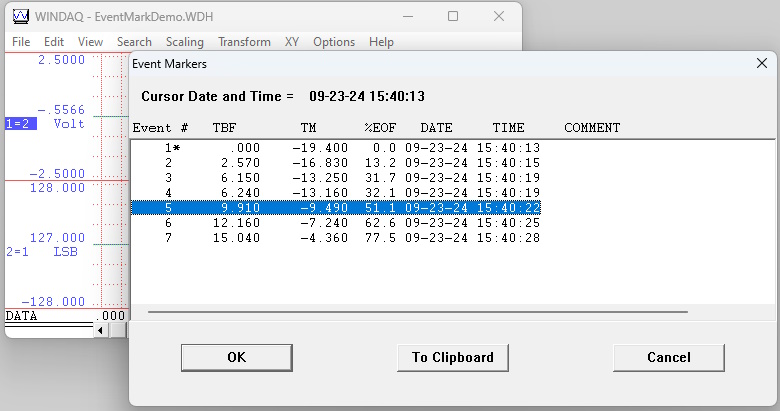
View Event Marks
Once data acquisition is complete, double click on a data file to open it in the WinDaq Waveform Browser.
To view your event marks, choose ‘Event Markers’ from the ‘View’ pull-down menu.
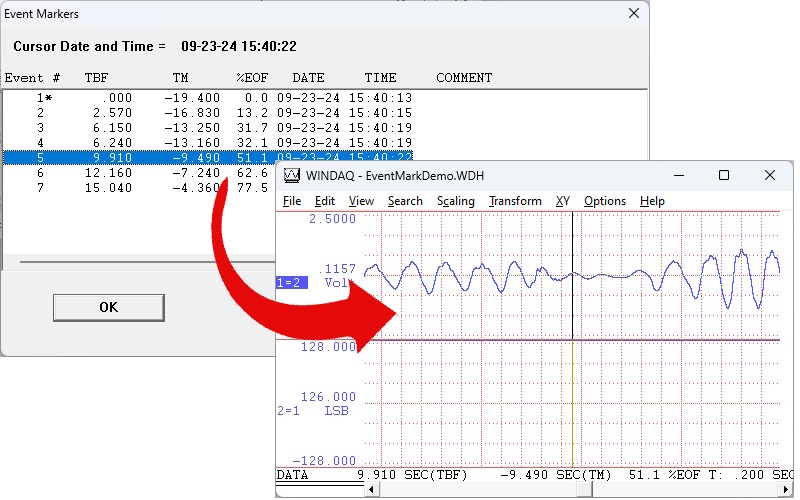
Double-click on an event marker to jump to that point in the data file (as shown below).
Follow Us![]()
![]()
![]()
![]()
![]()
![]()
![]()
![]()