On This Page
Verify that you’re installing the latest version of WinDaq
Verify that your Network Interface Card (NIC) has a static IP address
Disable any wireless connections
Verify Windows Firewall settings
Run the DATAQ IP Manager as an administrator
Make sure that your Ethernet cables are not more than 100 meters in length
Verify that your Ethernet cables are connected correctly
Reset your Network Interface Card (NIC)
Upon installing WinDaq and running the DATAQ IP Manager, no instruments are found.
Your Network Interface Card is not listed in the “Select Network Adaptor” window.
An “Error binding UDP port 1234” error message
Could be the result of one or more of the following:
You’re running an older software installation
Your Network Interface Card (NIC) does not have a static IP address
A wireless router is attempting to assign you NIC an IP address
The IP Manager is not listed as an exception in Windows Firewall settings
You’re not running the DATAQ IP Manager as an administrator
You’re using Ethernet cables that exceed 100 meters
The instruments is not connected properly
The Network Interface Card is hung up
To resolve these issues follow the steps below.
Verify that you’re installing the latest version of WinDaq
You can download the latest version of WinDaq for your DI-720/730-ENB at:
https://www.dataq.com/support/upgrades/record/g1lev3en.html
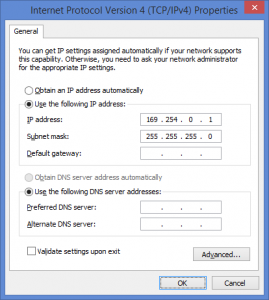
Verify that your Network Interface Card (NIC) has a static IP address
As outlined in the Installation Guide, verify that your NIC (TCP/IPv4) has a static IP address.
Disable any wireless connections
Make sure that any wireless connection are disabled (not just disconnected).
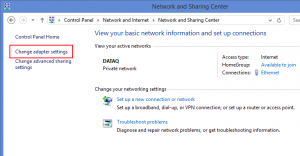
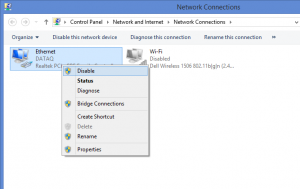
To do so, open the Windows Control Panel, choose ‘Network and Internet’ and select ‘Change Adaptor Settings’.
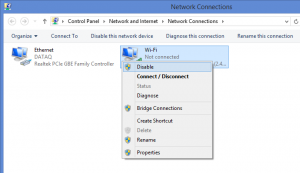
Right-click on the Wi-Fi connection and choose ‘Disable’
Verify Windows Firewall settings
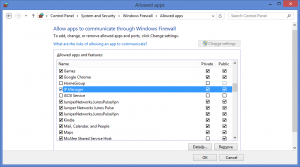
Make sure that the DATAQ IP Manager is allowed through the Windows firewall, for both Private and Public networks.
To do so, open the Windows Control Panel, choose ‘System and Security’ and select ‘Allow an app through Windows Firewall’.
Select both the ‘Private’ and ‘Public’ checkboxes.
Run the DATAQ IP Manager as an administrator
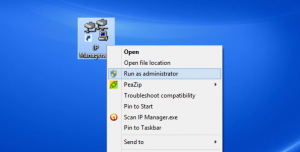
Right-click on the ‘IP Manager’ shortcut and choose ‘Run as administrator’
Make sure that your Ethernet cables are not more than 100 meters in length
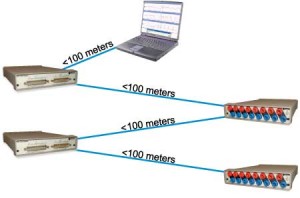
The Ethernet cable connecting your DI-720/730 EN-B to the PC and ones between synced units cannot exceed 100 meters in length.
Verify that your Ethernet cables are connected correctly
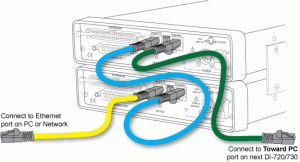
The “Toward PC” connection on the back of the first synced (unsynced) DI-720/730 EN-B should be connected to the Ethernet port of the PC or network. The “Toward PC” connection of the second synced unit should be connected to the “Expansion” connection of the first synced unit, the “Toward PC” connection on the third synced unit to the “Expansion” connection on the second synced unit, etc.
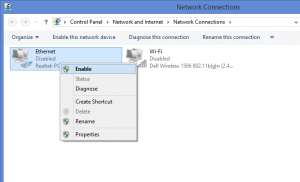
Reset your Network Interface Card (NIC)
To reset your Network Interface Card, open the Windows Control Panel, choose ‘Network and Internet’ and select ‘Change Adaptor Settings’.
Right-click on the network connection and choose ‘Disable’
With the connection disabled, right-click again and choose ‘Enable’
All DI-720, DI-722 and DI-730 EN instruments, the DI-785, DI-788 and the DI-5001-E


 View Cart
 sales@dataq.com
 330-668-1444