|
|
|
|
Digital I/O Setup |
|
Products: All DI-710, DI-715B, DI-718B, and DI-718Bx products.
If you are using the Digital I/O features in WinDaq Acquisition Software (or when writing your own program) and your instrument has bidirectional digital ports you must first configure the Digital bits using the Digital I/O Setup command.
Note: To use the Digital I/O Remote Control Features in stand-alone mode see Remote Control.
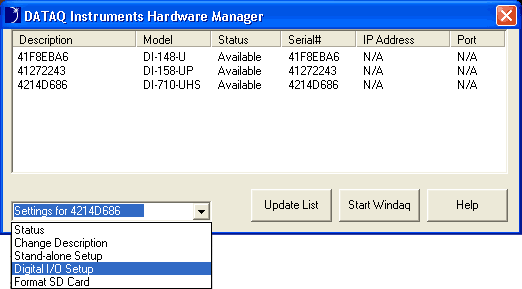
1. Highlight the device you would like to configure the Digital bits for.
2. Click on the Digital I/O Setup command in the drop-down list. If the Digital I/O Setup command does not show up in the command list then you have an incorrectly configured Remote device (see Change IP/Port).
3. Set each digital bit as an input or output and as a high or low signal. Only the digital bits available for your instrument will be configurable.
4. After you have completed your options click on the OK button to configure the digital bits in your instrument.
The digital channel may now be used. These settings do not affect the Remote Control Setup in Stand-alone mode - i.e., if Remote Storage and/or Remote Events are enabled in stand-alone configuration, bits 0 and/or 1 will be ignored in Digital I/O Setup.
