
 View Cart
 sales@dataq.com
 330-668-1444
For latest support articles and technical information please visit our up-to-date Blog
DATAQ Instruments Hardware Manager Lists Device as "Not Installed"
 View the pdf
On This Page
Symptoms
Cause
Resolution
Applies To
Symptoms
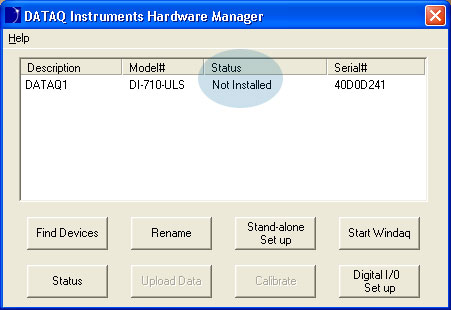
After proper installation the DATAQ Instruments Hardware Manager lists your device as “Not Installed” rendering the device inaccessible.
Cause
Error created during installation incorrectly determining the virtual COM port to which the device was installed.
Resolution
Find the COM port number of the installed instrument by looking in the Windows Device Manager:
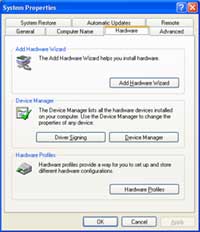
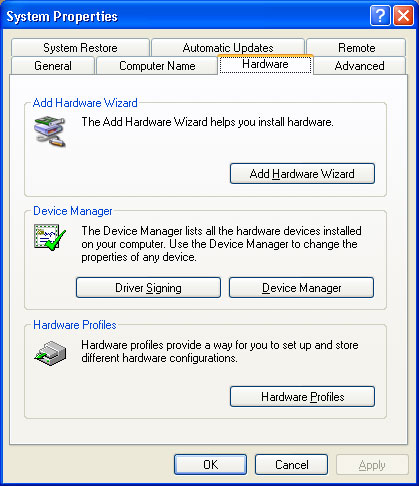
- Go to your desktop and Right-click on the My Computer icon.
- Click on Properties.
- Click on the Hardware tab, then click on the Device Manager option.
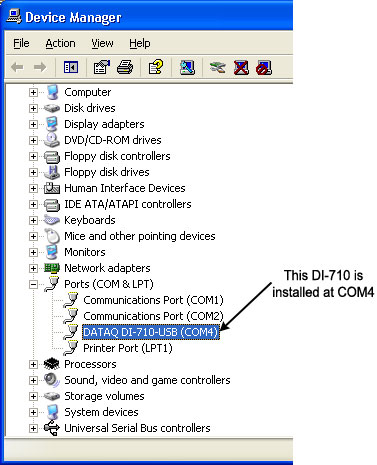
click on image for closeup - Find Ports (COM & LPT) and expand by clicking the + box to the left. This shows all COM and LPT ports currently assigned on your computer.
- Find DATAQ DI-xxx-USB (COM#) (xxx is the model number of the device - # is the COM port designated to your USB device).

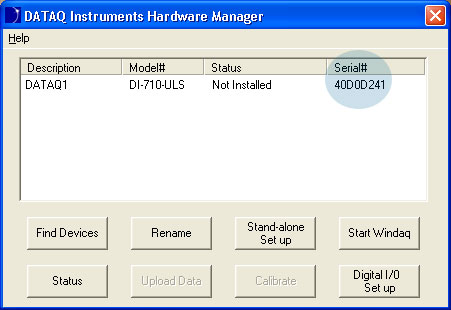
click on image for closeup - Find the Serial Number of your device. The serial number can be found on the sticker attached to the bottom of your instrument or by opening the DATAQ Instruments Hardware Manager.
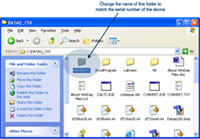
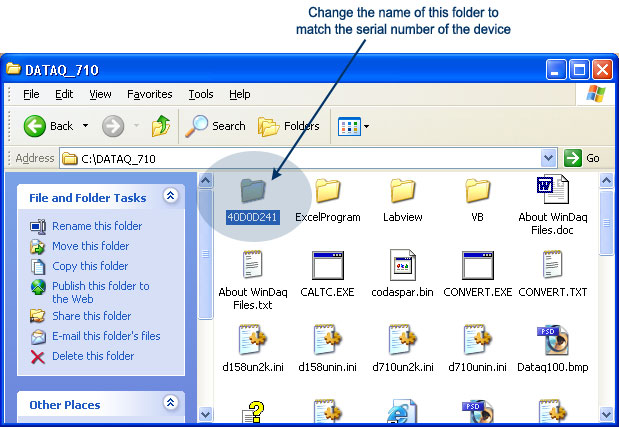
click on image for closeup - Go to the DATAQ directory on your hard drive as specified during installation (default is C:\DATAQ). There should be 4 folders inside this directory: ExcelProgram; LabView; VB; and a fourth possibly named 0 (folder contains four files: codaspar.bin; DEVICE.INI; DISETUP.EXE; and DiSetup.log). Rename the fourth folder to be the serial number of your installed device.
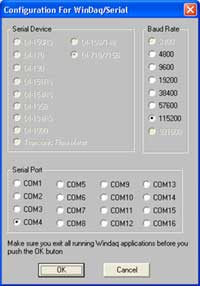
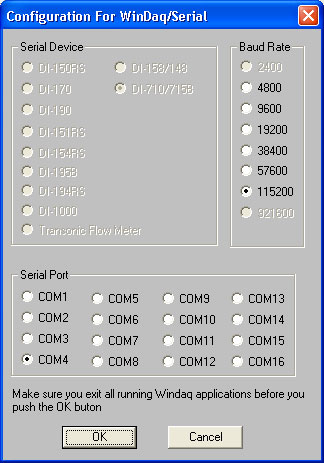
click on image for closeup - In your newly named folder find and run the program called DISETUP.exe. Change the port number to match the COM port designation of your device (see step 1 above) and change the Baud to 115200.
click on image for closeup - Go to the DATAQ directory on your hard drive as specified during installation (default is C:\DATAQ). Find the file named WDQDK1-1.exe. Rename the file to WDQDK1xx.exe substituting your COM port for “xx”(if you have a single-digit COM port precede the COM number with a 0). For example, if my instrument is installed at COM 4 I would rename this file to WDQDK104.exe.\
- Go to the Windows\System32 folder (C:\Windows\System32). Find the files DI1-1NT.dll; DISCN1-1.exe; and DICOM1-1.exe. Rename these three files replacing “-1” with your COM port number (as in Step 5). For example, if my instrument is installed at COM 4 I would rename these files to DI104NT.dll, DISCN104.exe, and DICOM104.exe.
Applies To
The information in this article applies to DATAQ Instruments Hardware Manager with Windows 2000 OS.